


^^These^^ awesome new solar panels are really rocking our cruising world these days! Thank god we (Jereme) installed these babies before we left Naples. It might have been a bit of a learning curve on all the electrical/wiring install, but they are well worth their weight in gold. You can find Part 1 of our solar panel install >>here<<, where we talk about the type of panels we purchased and our new battery bank.
Currently, on s/v LAHO, our only ways to generate power are: 1. shore power (i.e connecting on land), 2. running the engine, or 3. via our new solar panels. Well, for nine straight days, we’ve been on a mooring ball here in Boot Key Harbor and have ONLY used our new Aurinco panels! We haven’t had to turn the engine on once! Pretty awesome, huh? Another reason to love that beautiful sunshine! :))
Daily, we are consuming about 70 to 100 amps, and usually bring in that much or more through our solar panels. We’re monitoring everything through our nifty new battery monitor, but more on that in Part 3, coming soon!
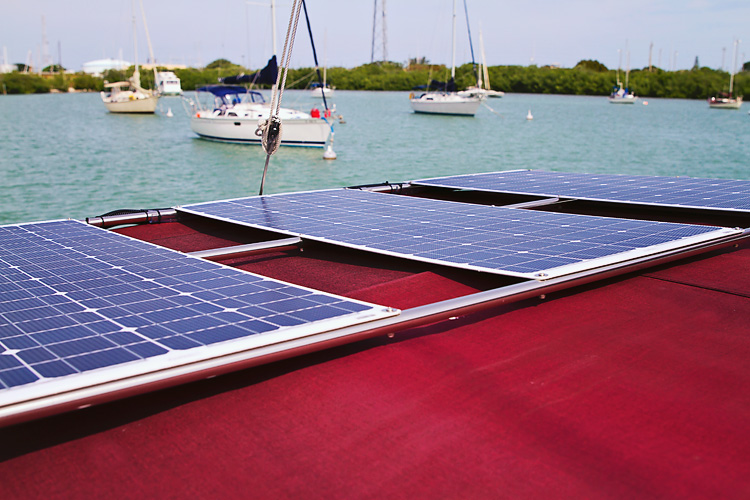
Back to our panel install and the support structure Jereme designed to hold our three, 100-watt panels.
We originally wanted to sew the panels directly to the bimini canvas using fabric pockets. However, when we received the panels we quickly realized the edges of each panel were not wide enough to fit (and stay in) pockets. So we went back to the drawing board. The panels are quite light weight, so we opted to build an additional structure on top of the bimini to hold the panels, without needing to reinforce the bimini.
The easiest design for placement of the panels (utilizing an additional stainless tubing support structure) was to place all 3 panels side by side towards the back of the bimini. Luckily, all three panels fit perfectly in size this way!
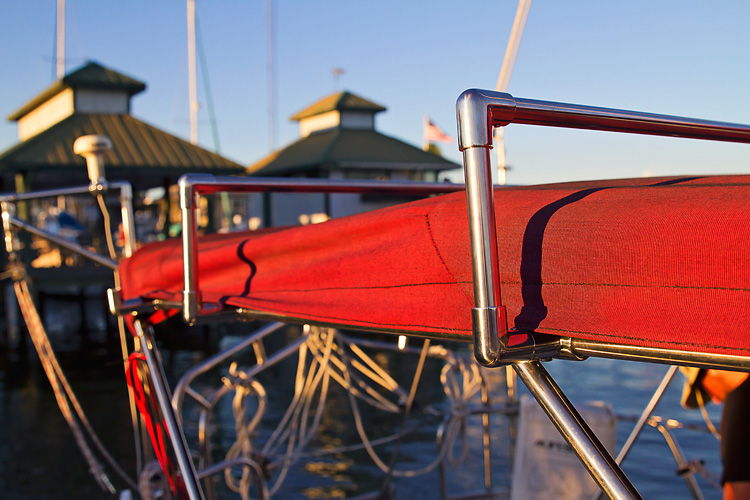
We basically built a bimini “roof-rack” for the panels. And since this was a bit of a DIY job, and we don’t own stainless tubing tools to bend the tubing, we ended up needing a ton of fittings to work the curves/angles of our new roof-rack design. We purchased three, seven-foot stainless tubing bars from Marine Trading Post back in Naples. They also had the fittings we needed, but not enough of each type for the overall design (so we ordered them online). Our design required six ‘T’ fittings and 12 ’90’s’. The ‘T’ fittings needed to be a special “clamp on” variety because our existing bimini structure is riveted and cannot be pulled apart.

Jereme used a tubing roller cutter tool to hand cut the bars to size. After all the cuts were made, it was pretty simple to piece together our new “roof rack” and attach all the set screws.
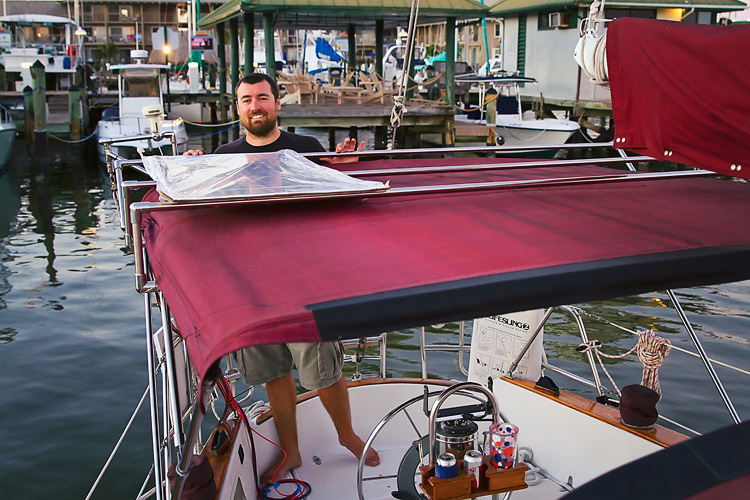
With our fancy new roof-rack structure in place, we then had to drill holes in the panels AND in the stainless tubing bars to attach the panels. We basically took one panel at the time, dry-fitted it on the support structure, marked the holes with a sharpie and started drilling. Drilling the aluminum (flat) panels was easy. Drilling the stainless steel (round) bars was WAY less fun. I think we went through six or seven drill bits in the process and each hole drilled on the stainless bars felt like it took forever. Or maybe that’s just because I was holding the bar steady in one hand and using a shop vac tube in the other (trying to catch chards of flying scrap metal). Fun times! After all the holes were drilled, we simply bolted the panels on.
Wiring (or hooking up) the panels was pretty easy. Each panel has a positive and negative wire that is wired directly to the charge controller. We ran the panel wires down the bimini stainless tubing and into the existing blower vent (since there is already an opening on the side of the boat that was being used for our GPS satellite receiver wire). We actually found a guy here in Marathon to sew us a canvas wire snake (or conduit) to cover the panel wires running along the bimini. On our sail down from Naples, we had covered these wires with some spilt tubing plastic conduit as a temporary protective cover (which worked great too!).
The last few parts of this project involved wiring the charge controller, battery monitor, and inverter! Part 3, coming soon!
>>Thanks for visiting LAHOWIND sailing blog! We’d love for you to get to know us and follow our story as we attempt to navigate a whole new world of sailing, as we cruise the Bahamas + Caribbean. …Learn more about us and our sailing + cruising adventures.
We’re thinking we’ll need about 300w of solar power as well. You’ll have to let us know how they work for you long(er) term 🙂