


Before we get to sharpening, I wanted to take 2.5 seconds to thank everyone for the great feedback and questions! I am thrilled some of you are finding my Photo Friday Series helpful. Yay!!! Keep those questions coming! :))
Back to regular scheduled programming…
Ahhhh, sharpening! I’ve received a handful of questions regarding this topic…and it’s a good one! Sharpening is such a great tool available in lots of different editing softwares, including Photoshop, to really make your images pop!
There is technically no crazy voodoo magic to achieve crisp polished photos. Some people are under the impression that sharpening will help them recover lost details in pictures that are otherwise too blurry, dark, or bright to be usable. Unfortunately, nothing could be further from the truth. Sharpening doesn’t give back details. It makes the details you already have appear to stand out a little more. So before you ever get too crazy editing up a storm in the digital dark room, work on snapping a quality image the first time and you really won’t need to spend much time crisping them up after the fact. That being said, a little Photoshop sharpening can add a certain level of depth to your image by enhancing details and making it more refined.
Sharpening works by increasing the contrast along the edges so that there is a quicker transition from light to dark and the edges become more defined. Photoshop offers a few different ways you can sharpen or fine-tune a photo. The most traditional method is the Unsharp Mask (my favorite!), and the newer (and some would argue better) Smart Sharpen filter. By the way, I still think it sounds crazy to call a tool that “sharpens” an image the UN-sharp mask. What the heck?!?
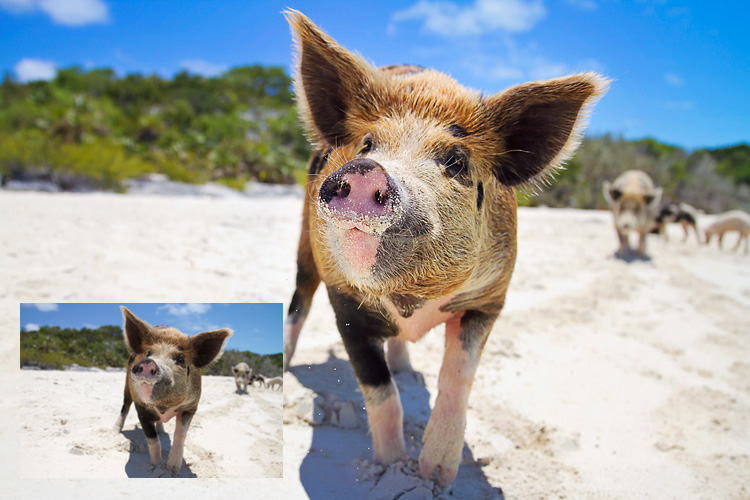
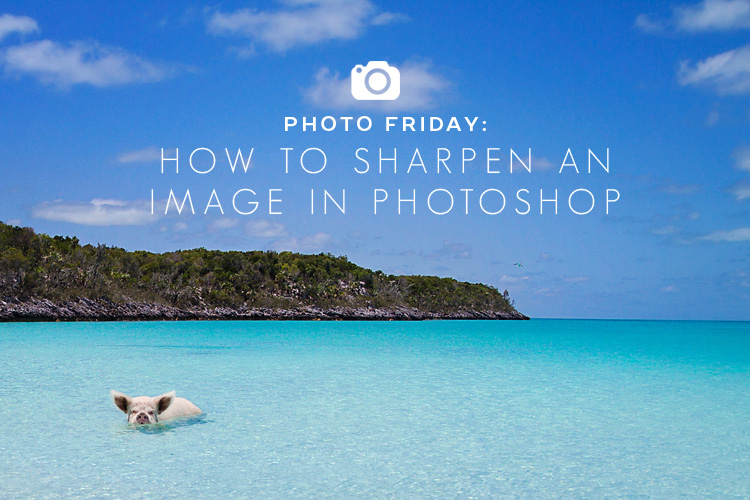
I’ll be using ^^this photo^^ of my favorite island piggies from the Exumas, Bahamas to demonstrate sharpening because, seriously, how much fun is it to stare at zoomed in granuals of sand on one cute and extra hairy pink snout? ;)) PS – the before and after above uses some of the steps I talked about in my “Editing Basics” Photo Friday post two weeks ago.
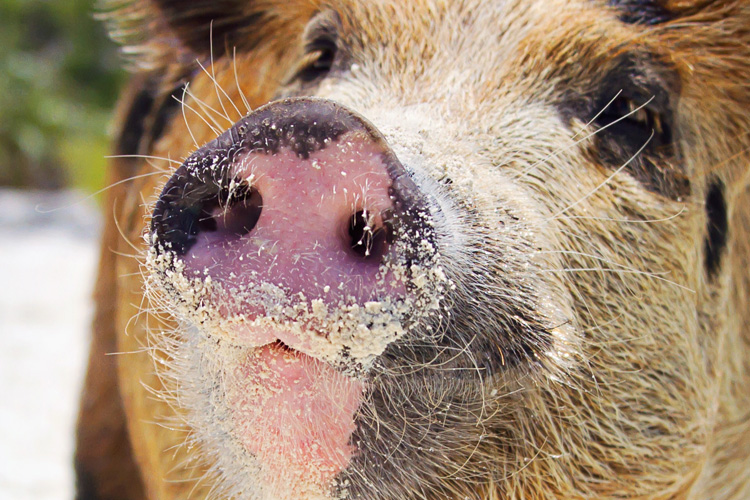
^^Here is a zoomed in look at my photo. That oinker means business! I did not sharpen ^^this version^^ whatsoever. The level of detail on my focal point (the snout) is still totally crisp…so when I do sharpen it in Photoshop, it is simply to give it a tiny bit of polish, if you will.^^
Using the Unsharp Mask:
First, locate the Unsharp Mask in Photoshop using the Filter menu — Filter >> Sharpen >> Unsharp Mask.

The dialog box that opens has three slider controls — Amount, Radius, and Threshold. Amount sets the overall level of sharpening; Radius dictates how large of an area around an edge is sharpened; and Threshold is used to indicate which edges are sharpened. A large threshold value means sharpening will only be applied to high contrast areas; whereas, a low threshold value means that sharpening is applied also to low contrast areas and finer details.
^^A normal/average amount of sharpening for this particular image.^^
^^A scary amount of sharpening. Yikes! A pig should not look like that.^^
Pushing the level of sharpening too far results in a very scary contrasty photo. Over sharpening often looks WAY worse than sharpening at all. So puhhhhlleaasseee don’t go nuts with these tools!
Now, here’s an example with a human subject to give you another perspective. By the way, this image was shot on our second day as “official cruisers.” We had just crossed under the seven-mile bridge in the Florida Keys!!!
This image was first resized for web, and then sharpened…
And a close-up of the before and after sharpening on some of Jer’s handsome facial features… ;))
See the difference? Subtle, not crazy sharp-town or anything.
Finding a good recipe for ^^those^^ three sliders I mentioned above takes a little experimenting and finessing. But whatever you do, do NOT overdo it. Okaaaayyyyy? Okay, great.
Moving right along.
Using Smart Sharpen:
The Smart Sharpen tool is another sharpening option in Photoshop. Lots of folks rave about this one compared to the Unsharp Mask, but for some reason I’m still a fan of the Unsharp Mask route. Once again, go into Filter >> Sharpen >> Smart Sharpen.
Of course they made the default settings horrible for some reason. So be prepared to tweak them.
Adjusting the Amount and Radius settings in Smart Sharpen has the same impact as when using Unsharp Mast, but you can choose what type of blur (Gaussian, Lens or Movement) to correct using the Remove drop-down menu.
Gaussian Blur is the general softness that is also addressed by Unsharp Mask, the Lens Blur option detects edges and detail and is a good choice for sharpening fine detail (that’s what I selected here). And Motion Blur aims to reduce the effects of camera or subject movement.
Obviously, there’s no magic number that works for all images so be prepared to experiment a little. Here’s the before and after zoomed in look at mr. piggy…you can see how the image on the right just pops a little more, right?
A few “sharp” words of wisdom! ;))
1. Don’t sharpen your master image file. Create a copy of it and flatten all layers before running the Unsharp Mask or Smart Sharpen.
2. Sharpening is very specific to output and should be the absolute final step in your workflow. Edit, crop, resize, whatever, and then sharpen.
3. When sharpening, make sure you are viewing your image at 100% or you will not really see an accurate representation of your sharpened image. You could be way overdoing it and not even realize.
When done the right way, sharpening can greatly enhance an image and make it pop!
Happy Photo Friday!
*I’ve started a regular “PHOTO FRIDAY” series on the blog. You can find all of my photography series posts >> here.
>>Thanks for visiting LAHOWIND sailing blog! We’d love for you to get to know us and follow our story as we attempt to navigate a whole new world of sailing, as we cruise the Caribbean. …Learn more about us and our sailing + cruising adventures.