Woot woot! Our sails are back from the sailmaker after getting a little stitching TLC. I was beginning to miss those sails, although with all our boat projects lately, we haven’t even moved the boat from her slip in a few weeks.
You may recall this post at the tail end of September where we were taking down our sails for some maintenance and repair work. We hauled both our jib and main down to Bronwen the Sailmaker on Marco Island (she came highly recommended as the best in Southwest Florida!) and she’s been working her magic freshening up our sails ever since.
This week, Bronwen dropped both off to us at the city dock…in two tightly wrapped, perfect little packages. Let’s just say, neatly folding the sails on take-down was not our strong suit. 😉 We chatted with Bronwen for a bit and were thrilled to hear she thought our sails were actually in excellent condition and considered a top-notch brand! Bronwen thought both sails were about four to six years old; the main had a few random pinholes (hmmm??? not sure what that’s about?); the jib was in better condition than the main; and someone might have left the sail cover off our main for a bit because it had a bit of sun damage. …And Bronwen might help us with some canvas work in the near future. 🙂
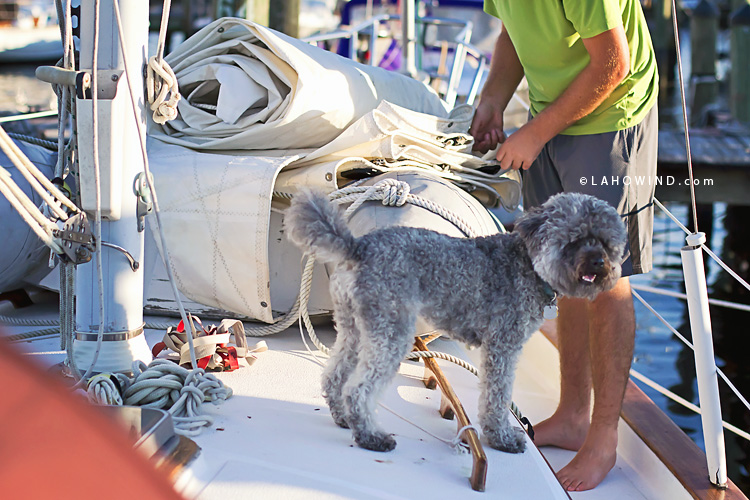 ^^Oliver supervising as usual.^^ 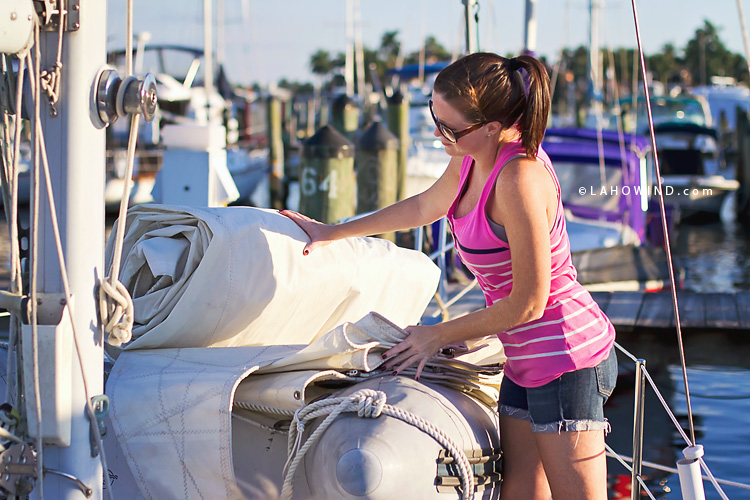 ^^so much easier to work with when it’s perfectly folded and rolled! someone please teach me how to do this.^^ Although we only had about an hour or so before sunset, Jereme and I decided to go ahead and put the main back up.
Reattaching the sail went a little smoother than taking it down, but (let’s not lie) there were still a few choice words exchanged between the two of us. 😉
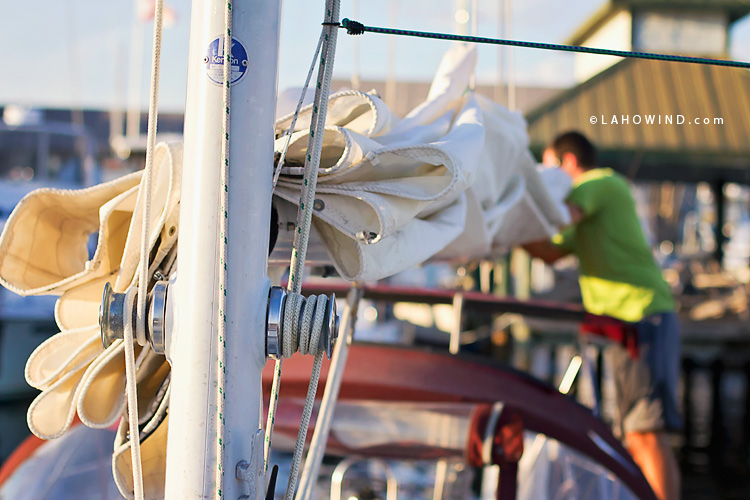 ^^halfway there.^^  ^^totally unrelated comment but how great is Jereme’s “longer” hair?! Right?!!!^^ We got the main back up (minus threading the battens), but the jib will have to wait for another day — we ran out of sunlight. I think we can safely cross this one off the project list!
>>Thanks for visiting LAHOWIND sailing blog! We’d love for you to get to know us and follow our story as we attempt to navigate a whole new world of sailing.
…Learn more about us and our sailing adventures.
Posted in Boat Projects, Sailing BlogTags: Boat Projects, Bronwen Marco Island, Endeavour, Endeavour 37, Laho Wind, LahoWind, Naples Sailing, Putting up the jib sail, Putting up the main sail, Putting Up the Sails, Sail Care, Sail Maintenance, Sailboat Projects, Sailing Blog, Sailing Couple, Sailmaker
We didn’t need our marine survey to tell us what we already suspected (although they did anyway). We have one (and only one) soft spot on our boat — located on our anchor well hatch.
>>An easy way to check for deck issues is to walk barefoot on all horizontal surfaces and feel for any areas of concern. Soft spots will give and bend a little when walked upon, and can indicate very serious problems. You can also confirm your suspicions by lightly tapping a mallet or screwdriver against the area of concern and then comparing the sound you hear with that of healthy deck area. The difference in sound is usually crystal clear.
In our case, our anchor locker hatch was substantially weaker and felt quite a bit softer when walked upon (a water deteriorated core being the likely culprit). Luckily, it never gave way when stepped on over the past few months, and now it’s in the process of being fixed! (item #33 on our boat project list)
^^and last I checked, brown liquid should not be pouring out of the hatch — another obvious sign of an issue^^ Our soft spot was a clear case of rotten wood caused by moisture penetrating a hole or leak in the hatch. Over time, it eventually deteriorated the plywood core.
Repairing substantial areas of delaminated deck can be very expensive (especially if you are paying someone else to do the work) or quite time-consuming (if you’re DIY-ing it yourself). We are super fortunate in that our soft spot is only located on the hatch (or door) of our anchor well…a MUCH easier and more convenient area to fix. AND less expensive!
So, we removed the hatch off the anchor well and brought it home where the multi-step process of fixing it would be much easier from the comfort of our garage. 🙂
Jereme laid the hatch upside down and used a Rotozip with a fiber disc to cut through the bottom layer of fiberglass (the rotozip easily got the job done). He chose to cut the bottom side of our hatch so that any mistakes or imperfections would be hidden on deck. Jereme also made sure not to cut too deep through the lid, and once the cuts were made (and since the wood was rotten underneath), the piece of fiberglass lifted right off.
Jereme used a crowbar, chisel, and hammer to scrape out all of the rotten wood. This part was rather time consuming. It took him about six hours to remove it all.
^^Um…the damage becomes pretty obvious after she’s open, don’t ya think?!^^
Once the old wood was removed, Jereme measured a sheet of 3/4″ marine grade plywood (1/2″ would have been better, but we bought the wood before cutting open the hatch) and cut it to the shape of the lid so it would fit in the hatch.
Next up, West Systems epoxying.
Jer mixed up a batch of our favorite West Systems epoxy and slathered on a healthy dose to both the hatch inside and one side of the new plywood, and placed them both together (epoxy sides touching of course). He weighted down the hatch/plywood combo with a few water jugs and let it dry overnight.
^^Ahhh…fresh marine grade plywood and the first injection of west systems epoxy.^^
The next day, Jereme mixed up another batch of epoxy and filled in the gaps between the lip of the fiberglass and the wood by carefully pouring epoxy around the edges. …Letting it dry once more overnight.
A third round of epoxy was added the following day, but this time Jereme added filler to the epoxy so he would be able to better shape (or form) the proper angle.
On the fourth day, Jereme reattached the piece of fiberglass he originally cut off by epoxying it and the newly fixed plywood/fiberglass piece, and sandwiched the two together. After the entire fiberglass-wood-fiberglass sandwich was weighted down and allowed to dry overnight, Jereme put one piece of 3-inch wide fiberglass cloth around the cut seam and applied a final coat of epoxy.
Our rotten hatch is now solid and ready to go!!! Install is happening later this week…
>>Thanks for visiting LAHOWIND sailing blog! We’d love for you to get to know us and follow our story as we attempt to navigate a whole new world of sailing.
…Learn more about us and our sailing adventures.
Posted in Boat Projects, Sailing BlogTags: Anchor Locker, Anchor Well, Best Sailing Blog, Boat Project List, Boat Projects, Caribbean, Cruising Blog, Endeavour, Endeavour 37 Sailboat, Fiberglass, Laho Wind, LahoWind, Marine Plywood, Projects, Repairing Soft Spot on Sailboat, Rotten Core, Rotten Deck, Sailing, Sailing Blog, Sailing Couple, Soft Spot, Soft Spot on Hatch, Top Sailing Blogs, West Systems
Join the party and follow us on instagram!!! @lahowind
>>Thanks for visiting LAHOWIND sailing blog! We’d love for you to get to know us and follow our story as we attempt to navigate a whole new world of sailing.
…Learn more about us and our sailing adventures.
Posted in Boat Life, Sailing Blog, Sailing LoveTags: Best Sailing Blog, Cruising, Cruising Blog, Endeavour, Endeavour 37, iPhone, Laho Wind, LahoWind, Naples Sailing, Sailboat Projects, Sailing Blog, Sailing Couple, Sailing Dog, Sailing Photography, Sailing Photos, Sailing the Caribbean Blog
Shortly after purchasing our sailboat, we quickly discovered that everything located in or near the head seemed to be leaking. (Ahhh! The joys of boat ownership!)
And since we are currently in the process of re-plumbing the head and have had to remove a wall as part of the project, what better time to rebed the chainplates in this area (since they too were leaking)???
To start this chainplate re-bedding project, Jereme removed the rigging by loosening the turn buckles, making sure to measure them and mark them where they were attached so that he would be able to reattach them in the exact same spot.
Once the shrouds were disconnected, he removed each chainplate cover and unbolted the chainplate (we did one chainplate at a time over the course of 3 days). He then got to work removing the actual chainplate. Let me tell you something, getting the chainplates out took some major muscling and several hours of hard work.
After the plates were free, Jereme thoroughly cleaned them by scrubbing each with WD-40 and using a razor blade to scrape off the old caulk.
^^one sparkling clean chainplate ya’ll! But more importantly, one awesome beard. ;)^^ >>Here’s where this project becomes a butyl tape party.<< 😉
Jereme used butyl tape to rebed (or seal) the chainplates. From our his extensive research, butyl tape is a much better solution for bedding than using silicone or caulk because the tape never dries, always remains flexible, has unlimited working time, isn’t messy, etc. etc. etc. Just a few of the many pros of using this tape.
We’re big butyl tape fans on this boat.
Shout-out to Compass Marine, where we found was the best place to buy butyl tape — plus their website shows you how to use it! We bought 100 feet (or 2 rolls) of bed-it butyl tape from Compass Marine. (We’ve also already used butyl tape to rebed our head tank pump-out fitting.)
After reattaching the chainplates and re-bolting them, Jereme made sure to continuously tighten the nuts every few hours since we used butyl tape. Tightening and re-tightening (multiple times) is necessary because the butyl tape is slow to react (for lack of a better technical description) — every time you tighten it, it squeezes out a little more and more.
^^beautiful butyl tape applied to a chainplate bolt.^^ Then, Jereme rebedded the chainplate cover with…you guessed it…butyl tape!
Once everything was nice and tight, Jereme reattached the shrouds.
Voila! Two of our three port shroud chainplates rebedded.
>>Thanks for visiting LAHOWIND sailing blog! We’d love for you to get to know us and follow our story as we attempt to navigate a whole new world of sailing.
…Learn more about us and our sailing adventures.
Posted in Boat Projects, Sailing BlogTags: Bedding with Butyl Tape, Boat Project List, Boat Projects, Butyl Tape, Caribbean, Chainplates, Compass Marine, Cruising Blog, Endeavour, Endeavour 37 Sailboat, Laho Wind, LahoWind, Rebed Chainplates, Sailboat Projects, Sailing, Sailing Blog, Sailing Couple
Back in June, I posted about our seemingly never-ending list of boat projects. This was a mix of labor/time intensive (and $$$ intensive) along with some super easy-peasy boat projects we could quickly mark off the list.
Jereme’s done an amazing job of knocking a few big ones off the list (like replacing the water tank and re-plumbing the head — which is half complete at this point) and keeping the ball rolling. He’s also been a great list-keeper-upper so that I know what the heck we’ve got going on.
So, three months after our last post, we’ve crossed HALF the items off our list!!! What what! Go us! 🙂
…And wittled it down to our current list of 20-ish projects…
I am actually beginning to see the light at the end of the tunnel, so to speak. There is still one or two big ticket items on here, like installing solar panels, but we’ve definitely made some major progress.
Here’s the current list:
Flares & flare gunCheck fire extinguisher expiration dateShower curtainFloat switch bilge pumpExtra bilge pump under quarter-berthWine bottle holder affixChange boat nameRegistration sticker – dinghyMaroon paint for boat stripeLight bulbs- Fix shelf/cabinet in head
Wing nut drawer guides quarter-berthSized rope with clasp for ladderStereo speakers- New fenders
- Charts — Florida/Bahamas
- Chafe protection for anchor lines
Fix hatch latch on anchor lockerPropane tanks and locker claspClean raw water strainer- Change oil; oil filters
- Fiberglass 4th side of engine oil catch tank
Jib sail needs restitching *at sail maker- Genoa furling drum serviced
- Crack in bobstay
- Bow port window leak
- Quarter-berth port light
Overhead hatch leaking- Autopilot needs to be fixed
Fix/replace water tankService seacocks- Spreader lights
Soft spot on anchor locker *in processCockpit LED lightsToilet/vent for waste- Fix wind instrument/tridata
- Enhance anchor/chain; check what exists
- Wax boat
- Oil leaks from timing gear
- Install solar panels, charge controller, and inverter
Replace plumbing to head *in process along with new head, tank, and hoses; replacing head wall, and replacing shower drainFix shower sump pumpWaterproof canvas top
We added these projects after the last post…
44. Fix/replace refridgerator
45. Replace reef and topping lift sheaves
46. Bathroom sink faucet
47. Rebed chainplates in head
>>Thanks for visiting LAHOWIND sailing blog! We’d love for you to get to know us and follow our story as we attempt to navigate a whole new world of sailing.
…Learn more about us and our sailing adventures.
Posted in Boat Projects, Sailing BlogTags: Boat Project List, Boat Projects, Caribbean, Cruising Blog, Endeavour, Endeavour 37 Sailboat, Laho Wind, LahoWind, Sailboat Projects, Sailing, Sailing Blog, Sailing Couple
|


Impressive list. And impressive check-offs! I see that you still need to get charts for the Bahamas. We invested in Explorer paper charts for the areas we were going through and they were SO helpful!
Thanks Jessica! We’ll have to check out Explorer charts for sure. 🙂
Just found your blog and knew by your “list” post that it will be one I will be following! We are also in Florida and just a few months away from departing for the Bahamas and beyond so it’s fun to see others in a similar preparations. Beautiful boat and blog. Thanks for sharing!
Deborah
Thanks Deborah!!! We are slowly but surely working through our list. 😉 Love that you too are sailing with your dog!
[…] original “never-ending boat project list” was started way back in June. And then we updated the list in October. And just last month, we gave another quick update on our project progress. At that time, we had […]
[…] there was our first update in October, to when we *really* starting making progress just this January, and our most recent update in […]
My wife and I looked at a 1979 Endeavour 37 – Plan A today. http://www.sailboatlistings.com/view/38654
Would love to compare notes, but especially curious if you might share a Word doc version of this to do list. I have a feeling the overlap might be significant.
Thank you.