LAHOWIND » Just you, me, + the dog.

Count em! 18 New LED Cabin Lights

This project was relatively cheap and easy.  Yay and yay!

We have 16 cabin lights on the boat.  Each light has 2 small 12-watt bulbs. Instead of replacing 16 fixtures with LED fixtures which probably would have cost over $600, Jereme had one hell of a lightbulb moment (man, I’m just full of awesome puns lately!) and simply swapped out all of the BULBS with LED bulbs at a much lower price of $140!   This includes 2 sets of backup bulbs.


The power draw on these new bulbs is 1-point-something-watts, basically about 90% LESS power draw.

We can run all 16 lights on our boat for the same electricity or power as it would have taken to run 2 of the original lights.  The new LED light is a bit whiter in color than our old soft yellowy-white lights, but I’m sure we will get used to it.

Oh, and the new lights also last for 60,000 hours! SIXTY THOUSAND! That’s roughly 59,900 MORE hours than the old light bulbs!  No big deal. 😉

>>Thanks for visiting our LAHOWIND sailing blog! We’d love for you to get to know us and follow our story as we attempt to navigate a whole new world of sailing.

JorgeNovember 8, 2014 - 12:03 am

Hi,
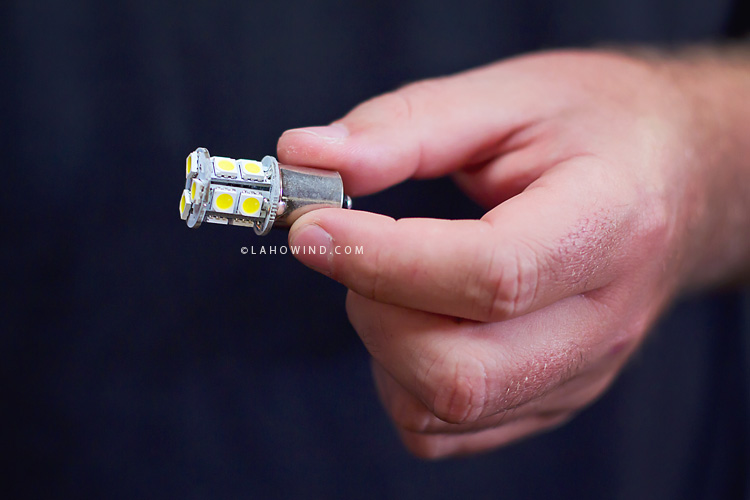
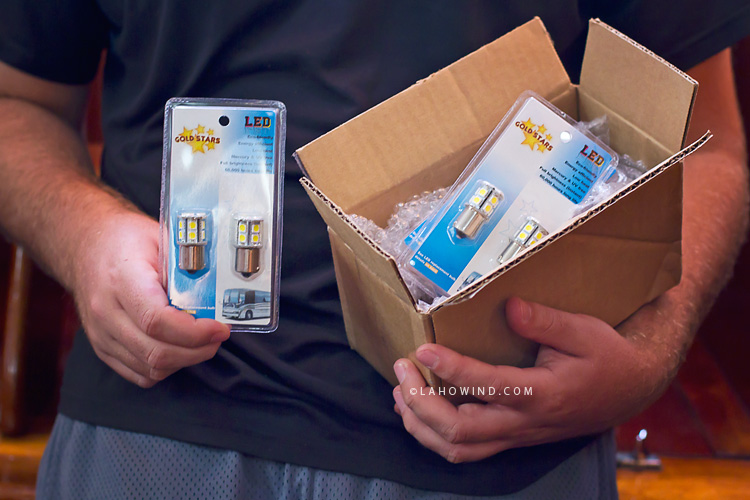
I am impressed with this easy project. Would you mind sending me brand and model of bulbs.
My boats name is Watermusic Endeavour 37 B 1977
Thanks

Let there be light! In the Cockpit.

Woot woot! We have light people. No more cockpit darkness at night!

Our boat came equipped with were zero lights in the cockpit. At night you can’t see anything.  Not really the brightest (pun intended), if you ask me. 😉

So, one of the items on our never-ending boat project list was to install some form of LED under-lighting to solve this problem.

We originally thought we would need to install two LED lights in the shelf units of the cockpit.  However, we quickly realized that would require too much wiring in “hard-to-reach” places. So, we opted to mount one Lumitec LED Rail2 Light (cost $60) directly beneath the traveler in the forward most part of the cockpit. This perfect spot for the light install is only about 12 inches away from our main electrical panel. This was also a cost-savings win-win since we would only need one light, AND way less wiring (12 inches of wiring vs. 12 feet for the original plan).

Now this is where the fun always starts. The install.

Once the new LED light finally arrived, Jereme drilled three holes in the area — two for the screws that would hold the light in place, and one for the wire. The LED light came with roughly 6 inches of wire, clearly not enough to reach the electrical panel. So, Jereme extended it and added 6 inches of wire.

Jereme consulted with our good friend Chris, and used his electrical know-how and great (FREE!) advice on how to properly wire the new light to what appeared at first glance to be a very confusing electrical panel. The previous owner had surprisingly neatly labeled, numbered. and organized the panel, making finding the right slot pretty simple.  The harder part was really figuring out how the whole electrical system/layout worked.

Luckily, we recently removed the shower bilge sump pump alltogether, which freed up a switch on our already-full panel.  Jereme wired the new LED light to that free switch. All we had to do then is relabel the switch from “shower bilge” to “cockpit light.”

The neat thing about the new light we chose is that it has two colors, red and white…AND a dimmer capability!  (The red light looks pretty snazzy if I do say so myself!)  All of those features are wired off of the two wires and one switch. Normally, you would need a few switches and a couple dimmers. But on ours you can toggle between colors and level of brightness, all by switching on and off ONE switch.

Project complete. 🙂

Our never-ending boat project list lit up in all its glory by our new fancy LED cockpit light!


>>Thanks for visiting our LAHOWIND sailing blog! We’d love for you to get to know us and follow our story as we attempt to navigate a whole new world of sailing.

boat life lately. according to my iphone

Join the party and follow us on instagram!!! @lahowind

Instagram

>>Thanks for visiting LAHOWIND sailing blog! We’d love for you to get to know us and follow our story as we attempt to navigate a whole new world of sailing.

10 Simple Steps to Replacing the Water Tank on Our Endeavour 37 Sailboat

Going into this whole boat purchasing process, we knew our 100-gallon water tank would need to be replaced. Sooner than later. As our marine surveyor oh-so-delicately put it…

“The water tank is suffering from corrosion.”

That’s a nice way of saying, it has holes. And last time I checked, I’m pretty sure water + holes = not good.

However when we were boat shopping, we also knew that the water tank on a 1982 Endeavour 37 had decent access, as compared to fuel tanks and water tanks on similar boats. Luckily, the fuel tank had already been replaced by the previous owner (one of the items on our boat shopping priority list).

So, roughly two months post-purchase, Jereme took on this fun little DIY project.

Side note, how much does the water tank look like a coffin?!  Right?

Here’s the “simple” 10-step plan of attack… 😉

Step 1. Empty water tank and remove hoses off existing tank. Check. Emptying the tank might have been the easiest part. Although we never really got all of the water out, which made the tank that much heavier to lift and move around. The 1.5-inch inlet hose and fitting were corroded, so Jereme had to cut a section of tubing off. Reattaching/resintalling the hoses should be interesting.

Step 2. Prep wiring/area for tank removal. Check. Check. However, some previous genius didn’t really give much thought to the retrofit wiring job that had wires running across the top of the tank, yet not even remotely enough slack to pull them aside in order to remove the tank. 🙁

Step 3. Remove existing tank. Sounds SOOO easy, right?  WRONG!!!!!!!!!!!!  After a LOT of bickering and some pretty tense moments, we weaseled this 100-gallon tank out of its snug little hole, up the tiny companionway steps and into the cockpit, through the dodger, and onto the dock! Success!!! I wish I would’ve videotaped this. It was NOT fun. 🙁

Step 4. Clean the area our tank has resided for the past 31 years. A great job for Jereme, if I do say so myself. He rocked it.

Step 5. Remove rotten wood and other debris. Jereme again. See Step 6 in regards to why we even had rotten wood.

Step 6. Figure out why the tank area is still amassing water when the holey tank has been removed. Awesome. We have water leaking down somewhere around the head and making its way out into the bilge area where the water tank sits.  Jereme seems to think the main suspect is our overhead hatch OR possibly the port light causing the water leakage.  This in turn has rotted the wood portion of the bulkhead on the forward end of the bilge. We haven’t gotten to the bottom of this yet. The rotten wood is gone. Yay! But, we’ve now added a new project to the never-ending boat project list… “diagnose and fix the leak.”

Step 7. Find a reputable tank manufacturer.  We had a few options when it came to water tanks.

We could purchase a pre-sized plastic tank from Trionic Tanks (in Wisconsin), but would have to pay big bucks for shipping. Also with the off-the-shelf sizing options, we would have to go with a smaller, unbaffled tank.  And, ultimately would pay a higher price due to shipping from Wisconsin.  That didn’t make sense.

Also, with a tank this large, you really want it to have baffles to resist the energy of 5 ft. or so of moving water. Our old tank had two baffles. The pre-made polyethylene tanks (like the ones sold at Trionic) don’t have baffles.

So, we ultimately have chosen to go with a custom polyethylene welded tank from Dura-Weld, a company located in Lake Worth, Florida. *As of July 31st, we haven’t picked up our tank yet, but we plan to drive over to Lake Worth next week (to save on shipping costs).

The custom fabricated tank we ordered is baffled. It is plastic so it will last forever.  And Dura-Weld will install all of the custom fittings we need (1 inlet, 2 outlets, a vent, and a 6-inch beckson access hatch). We are going to replace the removable lid with a clear plastic lid to use as an indication of tank level, instead of buying a tank gauge because those tend to break and you can never really trust their readings anyhow.

Step 8. Measure & order new custom fitted tank. Simultaneously say goodbye to 900+ dollars.

Jereme wanted to maximize the tank area, all the while making the measurements as simple as possible. The more intricate and complex the tank structure, the more expensive ($$$$) the tank will cost. The existing aluminum tank was trapezoid in shape.  It narrowed from the back to the front, which would be pretty complicated to fabricate (especially out of plastic), and thus expensive.

Leave it to Mr. Engineer 🙂 to make a spreadsheet of both the volume of a rectangular tank AND that of a trapezoidal tank, and tweak the measurements to maximize the volume.  Our new tank will be roughly 90-gallons (vs. the original 100-gallons). Ya, we know in reality we should want every drop of water that tank area can hold, but not only was this cost-savings in terms of fabricating a “less complex” new tank, but also we wanted the new tank to have a certain factor of safety  (in terms of measurement) on the sides of the tank. In other words, we didn’t want to pick up the tank and have it NOT fit the area.  That would be a major bummer. Plus, Jereme designed it an inch shorter so that it can be set atop plastic boards so that drainage from the front of the boat is able to run under the tank and make it all the way to the bilge. The original aluminum tank sat right on top of the upper bilge area and didn’t allow any water to drain from the front of the boat to the lower part of the bilge.

Step 9. Insert new tank (and hope to god the custom measurements we provided to the tank manufacturer are accurate). Coming soon! …We haven’t even picked up the tank yet.

Step 10. Reattach everything and fill with water! Boom!!!  We hope.  Stay tuned!!!

UPDATE: The new tank has been installed!!! Read about the last two steps here. 

[…] Jereme was working on the water tank replacement project, he of course needed to empty the water tank.  He thought, “what better way to drain the […]

[…] it has been a couple of weeks since our last post about the water tank (10 Simple Steps to Replacing Our Water Tank), where we had just ordered our new custom tank and were awaiting […]

Marcus NethertonOctober 19, 2013 - 9:09 pm

Looks great! We are looking at this same project next spring on our 1978 Endeavour 37, looks like you have done all the hard work for me already! Thanks I just stumbled across your site today and I really enjoy it.

Marcus
S/V Metta
1978 Endeavour 37

LahoWindOctober 20, 2013 - 2:22 am

Hey Marcus! We love our Endeavour. We’re hoping to knock out a few more projects and then get back to sailing again. We’d love for you to keep following along. Feel free to email us if you have any questions when you get to that water tank. 🙂

Marcus NethertonOctober 21, 2013 - 4:34 am

Thanks, I will keep in touch, I managed to replace all the ports and hatches and I am at the end of building a hard dodger for the boat. It is getting cold here in the Seattle area so that is forcing me to be content with what I have managed so far.

LahoWindOctober 21, 2013 - 11:28 am

Wow, that’s great! What brand did you use for the ports/hatches and would you use the same brand if you had to do it again? All of ours leak and need to be fixed.

Marcus NethertonOctober 22, 2013 - 2:51 am

We put in the ports from New Found Metals, we used their Tri matrix ports, which are plastic with stainless trim and dogs. I looked at using their all stainless ports but while they are great would have added considerably to the weight to the cabin house. I saw them at the boat show, but was really sold on them as they are located only about 45 mins away from us. The hatches we used are from Bomar (model BOM-N104910AX ) as theirs were the closest dimensionally to the old hatches with out a lot of modifications.

jimJanuary 30, 2014 - 3:54 pm

Hello! I have a 1982 Endeavour 37 that I’m nursing back to health. So far, my water tank is not leaking (knock on wood), but I definitely have rot at the same bulkhead/stringer/whatever. I read once that this is a common problem, stemming from poor drainage of the forward part of the hull, as you mentioned. Water comes down from the mast, anchor locker, etc. then remains forward of the bulkhead. There is a drainage hole, but it is small and gets clogged easily. I have a large bilge pump that I intend to mount in that forward hull section. Please enlighten me as to what you did to address the rotted wood you found. I’m going to try and avoid major surgery if possible, but the floor, etc. def needs new support structure in that area. Most of the floor in my boat was damaged and has been replaced by 3/4 ply with marine carpet over top, but after I address the rotted wood I want to put in a nice, teak and holly sole. I am almost finished my current project, which was to remove each port, pattern/replace the teak paneling and then reseal/replace the ports. I even had to remake several headliner panels and have replaced the lights with LED versions. Keep up the good work!

LAHOWINDJanuary 31, 2014 - 3:37 am

Hi Jim. Thanks!! Well yes there is definitely water that comes from the forward section of the boat that has created a host of problems. I don’t think the drain hole is poorly sized as I think it’s probably an inch to an ich and a half. I just think its poorly positioned and doesn’t drain all the water. Plus there is no access to this part of the boat under the floor so it’s in no mans land. So, as part of the water tank job i removed all the rotten wood and replaced it with 1×8 PVC plastic wood. Its actually used for exterior home trim like around garages. Since the rotten wood was mostly just to support the floor this PVC option worked great because its out of sight but also water proof.

Also, I am almost done with replacing all of our portlights (post about this tomorrow) and replaced teak facing, headliner, and all our lights with LED. So it looks like we are on the same page!!! Good luck.

Happy 4th of July!

Jereme and I spent Independence Day with my sister (Susan) and brother-in-law (Eric) who were in town for a few fun-filled, kid-free days! We knew we had to get them out sailing while they were here, but we really only had one day to make that happen…July 4th.

Although the forecast wasn’t looking all that amazing, we (Jereme, me, Susan, Eric, Oliver the poodle, and Toby the poodle) ventured out in the morning hoping for the best. We headed out of Gordon’s Pass in Naples and sailed along the coast of Naples. As luck would have it, a nasty squall popped up in what felt like 1.2 seconds and all hell proceeded to break loose.

It was a free-for-all, “grab the animals” kind of party. I literally passed out life jackets (wish I was joking). After about 10 minutes of crazy wind, torrential dowpours, everyone on board completey drenced, and two seriously pissed poodles, we headed back in knowing that the rest of the day would probably bring us more of the same. 🙁

We still managed to snap a few cute photos before and after, although no one managed to document the “squall” aftermath, and I kinda wish we had. It was pretty hilarious. All I can say is, we tried. Happy 4th of July ya’ll!