Guess who just got in their fancy new boat cards??? And we LOVE them! So we’re sharing them here on the blog of course.
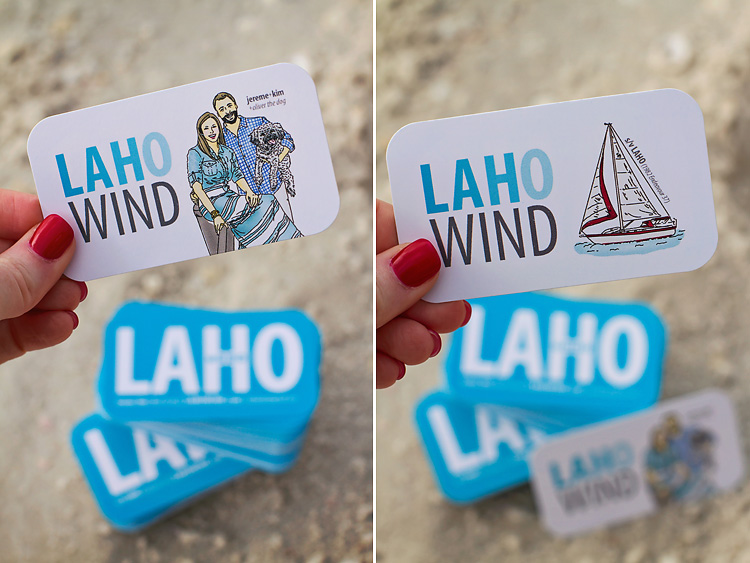
“Boat card? What the heck is that?” …you (non-cruisers) may ask. Well, cruisers exchange boat cards. Or so we’ve heard (we are not “official” just yet). And if you don’t have one to hand back, you’ll get funny looks.
They pretty much serve the same purpose as corporate business cards, but with boaty info instead…think boat name, boat make, crew members, email address, website, etc.
Even though we aren’t officially cruising, Jereme and I have both encountered numerous situations in the past few months where having a card totally would have come in handy. We’ve met so many awesome folks down at the Naples City Dock and elsewhere who we would’ve loved to give one to… I’m kinda sad we didn’t make these sooner!
Being the creative one on this ship, designing our boat cards was right up my alley! 
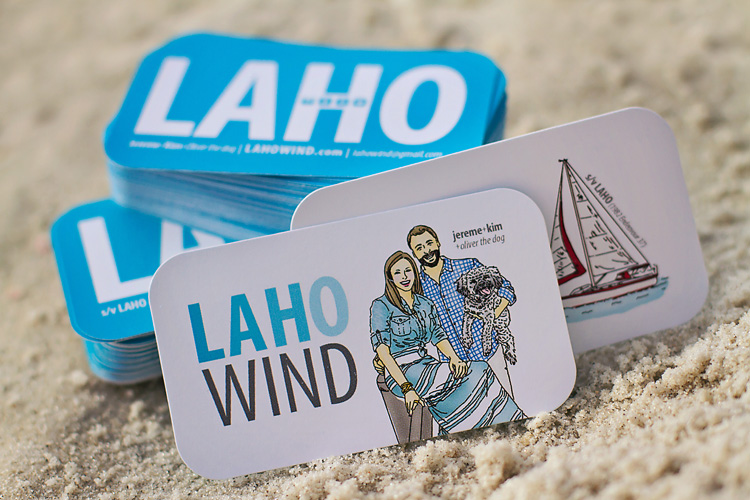
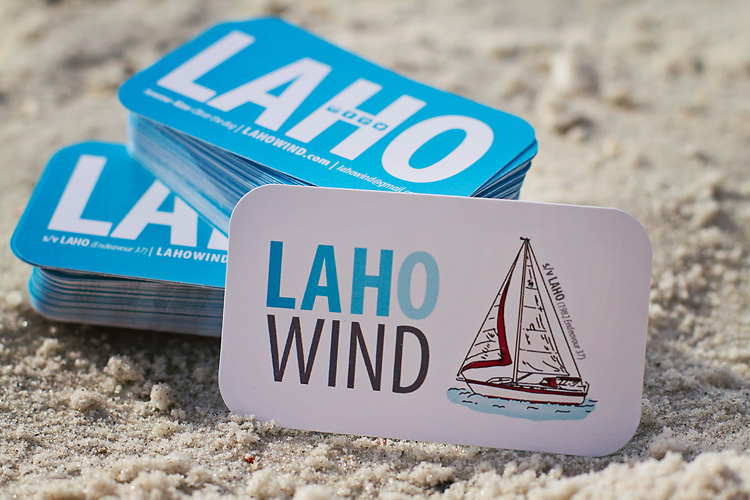
I tried to keep our card design simple yet bold (or so I like to think). I really wanted our faces and our beautiful boat on the card somehow, but (surprisingly being the photo geek I am) did not want to use an actual photograph. Instead, I had a super talented artist on Etsy create a digital illustration for us. I loved the illustration so much, I ended up designing two very similar card styles — one with the illustration of us, and the other with just the boat. They’re pretty much the same layout, just with certain information moved around a bit.
We had our cards printed on matte card stock with rounded edges through one of the professional labs I use for my photography business (only because its super easy for me to order online through their system and I know the quality of the product I’ll receive). And, we are thrilled with the way our cards turned out!
Now, we just need to start cruising so we can hand a few out! 
>>Thanks for visiting LAHOWIND sailing blog! We’d love for you to get to know us and follow our story as we attempt to navigate a whole new world of sailing and cruising the Bahamas + Caribbean.
…Learn more about us and our sailing + cruising adventures.
 ^^hi.^^
- Um, did you see the awesome grouper we caught this weekend while sailing with our friends Jody + Peter at Where the Coconuts Grow? Pretty awesome. And pretty tasty grouper tacos!
- So, Jereme is officially done working! Finished! Finito! And I’m super jealous.
- But that means he’s gotta crack down on our final list of boat projects so we can set sail (hopefully) very soon.
- I’m kinda secretly obsessed with my new Kindle Paperwhite
 . It’s quite addictive. . It’s quite addictive.
- Totally pumped about my newest Pinterest “Sailing Dinners” board, featuring lots of great recipes that are very doable in a boat galley and don’t call for 45,000 random ingredients. Looking forward to trying a few of these out in the near future!
- In case you missed it, we recently added a handy dandy “SUBSCRIBE” button to our blog. You can get all our updates, without any of the work. <<Check it out over there in the side bar.
>>Thanks for visiting LAHOWIND sailing blog! We’d love for you to get to know us and follow our story as we attempt to navigate a whole new world of sailing and cruising the Bahamas + Caribbean.
…Learn more about us and our sailing + cruising adventures.
Because that’s how I feel after we replaced all of the cotter pins with cotter rings on our sailboat.  Ahhh, the joys of boat ownership and cruising life, I suppose. Ahhh, the joys of boat ownership and cruising life, I suppose.
It was s a job that desperately needed to get done since we recently removed the plastic rigging sleeves that were protecting us from these jagged little pins. With the pins exposed it had become way too easy to cut our legs every time we brushed by one.
 ^^those pins were poking out like tiny little knives just waiting to slice a leg.^^ This was a pretty simple replacement job that entailed picking up a pack of cotter rings at West Marine, weaseling out the old cotter pins with pliers and a hammer, and inserting the new cotter rings using my beloved fingernails.
Yes, I could have easily just used a screwdriver to help open the ring, but for some reason I didn’t because the project was going so smoothly and speedily using only my nails/fingers. Oh well, lesson learned.


Let’s cross another (super small) one off the project list! Getting closer + closer to sailing!!!
>>Thanks for visiting LAHOWIND sailing blog! We’d love for you to get to know us and follow our story as we attempt to navigate a whole new world of sailing and cruising the Bahamas + Caribbean.
…Learn more about us and our sailing + cruising adventures.
Once we start cruising full-time, our dinghy will basically become our little lifeline to land. I kinda see our sailboat as our home, and our dinghy as our car to get around once we’re anchored offshore.
So needless to say, we need that dinghy fully functional. And preferably leak-free! 

Unfortunately, we recently realized we had a minor dinghy leak after our dinghy kept (slowly) losing air, so we added this item to our boat project list.
We thought the cause of the leak might be a faulty dinghy valve that would simply need replacing. So, Jereme went to work checking both valves.
One valve seemed to have a noticeably jammed spring (for the seal), so Jereme unjammed it and the valve seems to work perfectly. The other valve was fine too. And since neither valve was actually broken and needing to be fully replaced, we now have a backup valve on hand to use in the future.
 
With both valves checked, we still needed to find our leak, so we busted out the “soap test” to get the job done! Here’s how the process works:
1. Fully inflate your dinghy. Check!

2. Make a solution of soap and water. We just filled up a bucket with water and a couple pumps of the Dawn dish soap we have on board.
3. Coat one section of your dinghy at a time. We used our deck scrub brush to do this, just slathering on the soapy water.

4. Watch for growing bubbles. Bubbles formed pretty much immediately all over the dinghy (too much agitation from the brush perhaps — we should’ve slopped on the soapy water with a cloth), but quickly subsided. So we just waited and watched for new bubbles to continuously grow. After spotting a small patch of growing bubbles, we knew we had found the culprit. Or atleast one of our leaks. There could be multiple.

We kept searching for more bubbles.
Surprisngly, after quite a bit of waiting to see growing bubbles elsewhere, we still only found that one minor leak.
Since we were having leakage on both sides of the dinghy, we think the valve with the seal jam was probably the only issue on one half of the dinghy, and the small scraped area (identified by our soap test) was the cause of deflation on the other half of our dinghy.
Now we know and now we can fix the problem! We will be ordering a patch kit to fix the issue before we set sail.
>>Thanks for visiting LAHOWIND sailing blog! We’d love for you to get to know us and follow our story as we attempt to navigate a whole new world of sailing.
…Learn more about us and our sailing + cruising adventures.
Posted in Boat Projects, Sailing BlogTags: Air Leak Dinghy, Boat Life, Boat Projects, Cruising Blog, Cruising Life, Cruising the Caribbean, Dinghy Leak, LahoWind, Patching a Dinghy, Sailing Blogs, Soap Test
We are in the home stretch of getting Oliver (and ourselves) outfitted for life aboard, and most recently met with our vet for Oliver’s annual exam and checkup. (Side note – Oliver’s Titer test/certificate came back with flying colors so now we can check that item off our list).

^^this guy is pretty much ready for cruising life.^^
While we were at the vet getting Oliver up to date on all the necessary shots required for entry into various Caribbean islands, we also stocked Oliver’s medicine cabinet with several key prescriptions and got the lowdown on plenty of over-the-counter first aid products we should keep on board for him too.
I actually started the doggie Rx convo awhile back with our awesome vet, Dr. Stacey at Animal Oasis here in Naples, knowing that Oliver has historically been prone to semi-regular skin/ear issues. We want to make sure we have the necessary meds on board if and when we need to treat him in the islands. We also want to take the proactive steps now to keep his little poodle face healthy and happy while we’re sailing through the Caribbean.
Okay, let’s be real people. Oliver’s medicine cabinet has actually grown to be quite a bit larger than either Jereme’s or my own! And he’s just a little 20lb. fluffy poodle. How is that even possible?
We’ve stocked Oliver’s doggie medicine cabinet with the following key prescriptions:
- Cephalexin – antibiotic
- Cerenia – anti-nausea medication
- Heartguard – heartworm medication
- Tramadol – pain reliever
- Virbantel – dewormer
- Zymox – enzyme system for chronic ear and skin issues

^^Oliver’s bevy of scripts.^^
And, we’ll have the following “over-the-counter” first aid items on board for Oliver:
- Frontline (flea + tick)
- Hydrogen Peroxide
- Bedadine
- Epsom Salts
- Benadryl
- Neosporin
- Sterile bandages/guaze
- Butterfly closures
- Petroleum jelly
- Ear drying solution
- Baby aspirin
- Pepcid
- All the gear for grooming (clippers (fur+nails), doggie shampoo, toothpaste, etc.)
We also plan to have a few key food items on board in case Oliver has any gastro issues. This includes things like canned pumpkin, white rice, and wheat bran.
We’ll be making one final vet visit immediately before we set sail to get a freshly dated international health certificate and a USDA-endorsed cert (that is required at a few countries we plan to visit).
Soon, we’ll have a legit cruising dog with all the gear, meds, and certificates to prove it! 
PS – Why am I always the one stuck doing the dirty job of taking Oliver places he would rather not go (i.e. the groomers and the vet)? Although Oliver usually doesn’t totally hate going to the vet because he gets to chill with other waiting room dogs, this time he wasn’t such a happy camper! I really don’t blame him considering he had to get his blood drawn for the annual heartworm test and shot up with 3 different vaccinations, plus a nose spray one. I knew Oliver was super pissed this time around because after his appointment, instead of jumping in the car and happily laying on my lap, he hopped in the car and walked to the very very back (seats were folded down in the Jeep) and laid down facing backwards. Poor thing! (But don’t worry, he’s feeling like his old self already today!)
PSS – I’m pretty sure we’ve spent way more $$$ on Oliver’s health and well-being than our own. 
|





 Ahhh, the joys of boat ownership and cruising life, I suppose.
What a creative idea using the digital illustration, I love it!
Thanks Jackie!!! Any chance I get to be creative with boat stuff, I sure do try. -Kim
-Kim
Very nice job on the cards. You definitely have an “artsy” side.
We look forward to collecting one from you someday in a sunny and sandy part of the world.
Mark and Cindy
s/v Cream Puff
http://www.creampuff.us
ps ~ thanks for adding the “subscribe by email”. This way we can be sure to not miss anything.
Thanks guys! We definitely look forward to exchanging cards and meeting up again some day. -Kim
-Kim
LOVE THEM! When I created ours I wanted to keep ours ridiculously simple that now that I am actually using them they are too simple and lacking very important information (our name, or boat name for instance). I have so many that I cannot justify just making new ones so I am constantly hand writing our info on them. Maybe I should just make a stamp. sigh…
which etsy artist did you use? I used to hire people from etsy all the time back in my professional life
Thanks so much Kelley! I was debating on getting a self-inking stamp too. I’m thinking it might come in handy when we need to put our info on forms or whatever else. But I haven’t brought myself to purchasing one for that purpose just yet. I used LuvFirstSight for the digital illustration. I was really happy with the price (compared to some others on etsy) and her willingness to tweak a few things for me after seeing the first proof.